Author Unknown, Edited by Clare de Estepa
![]()
Welcome
News
Guild Info
Embroidery
Gallery
Calendar

Pattern from Needlewerks, Winter Edition 1997 Gregorian.
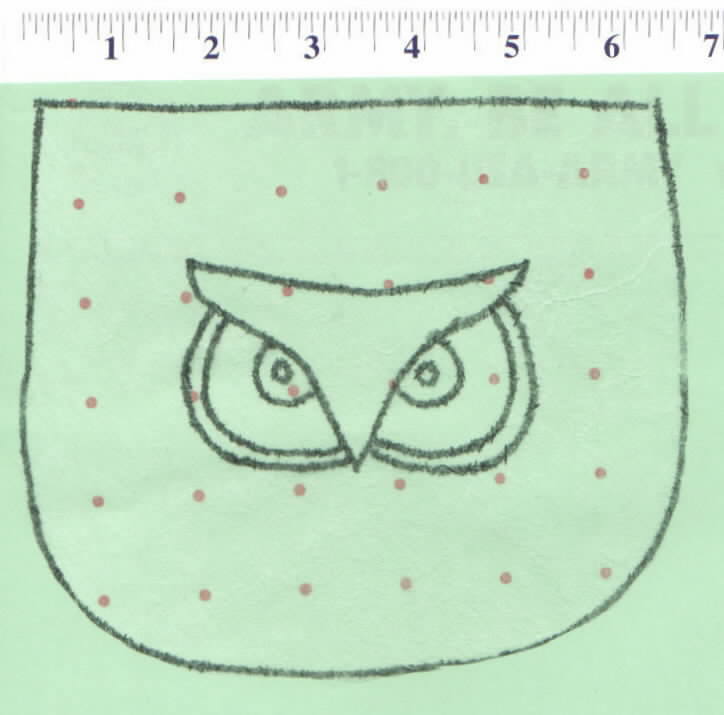 1. Get some pattern material
from a cloth store. It is very similar to thin interfacing with dots and it is very inexpensive. Lay the pattern material
over the pattern in the newsletter and traced it with a fine point Sharpie TM permanent marker.
1. Get some pattern material
from a cloth store. It is very similar to thin interfacing with dots and it is very inexpensive. Lay the pattern material
over the pattern in the newsletter and traced it with a fine point Sharpie TM permanent marker.
2. After cutting three velvet shells, turn one over to the wrong side. Lay the pattern over the velvet and anchor it with pins. Draw the owl onto the wrong side of the velvet with a Sharpie . This will transfer the embroidery pattern onto the velvet. When embroidering the pouch, just flip the velvet to the backside to determine where the needle should be placed. Use an outline stitch or a stem stitch. The jowls can be embroidered with a satin stitch.
3. For the straps, the original intructions stated to cut each one on a fold. Working with velvet, I found that extremely difficult. I solved my difficulty by laying two patterns for the straps side-by-side and cutting. The straps do not need to be lined.

4. Using the pouch pattern, cut three pieces of lining.
5. After the embroidery is done, sew the pouch flap to its lining.
6. Sew the two remaining pieces of lining together and the two remaining pieces of velvet together.
7. Fold the straps in half lengthwise, and sew a narrow seam along the edge. Then close one end of the tube with stay stitching. Use an unsharpened pencil or a crochet hook to turn the tube right side out.
8. Sew the straps to the velvet pouch and then sew the flap on. Be careful not to catch the lining.
9. Place the pouch lining inside the velvet pouch with the wrong sides together. Turn the lining under to hide the raw edges and stitch.
10. Turn the flap lining under and stich. Be careful that no stitches show along the topside of the flap. The OVO Pouch is done!